There are lots of people out there who want to learn how to fix their own cars, but like a lot of things it’s a hard skill to pick up, unless you just decide to give it a go.
It’s worth it though, as it won’t just potentially save you a lot of money, it’ll also help you get a lot more intimate with the inner workings of your vehicle and perhaps even make you appreciate the car that you drive that bit more.
The thing is, it can be hard to know where to start if you want to learn to wrench, as grabbing a spanner, popping the bonnet and diving straight in will result in moderate head-scratching at best, serious damage at worst.
As a result, it’s probably a good idea to start off with something a bit less intimidating and challenging, but thankfully there are a number of small jobs you can do at home with ease, and which can end up saving you a fair bit of money.
Change your oil and oil filter
One of the easiest and most painfully obvious bits of maintenance your car will need is an oil change. Not only is it the most classic of jobs, it’s also one of the most important.
Oil to your car is like blood to your own body, keeping all the engine components working efficiently and reducing both wear and the accumulation of nasty gunk inside the motor, as well as dispersing heat from the engine itself.
Over time - as the oil collects heat, carbon deposits and other things - it will become less like liquid and take on a sludge-like consistency, which diminishes its ability to do its job correctly.
For a start, it’s always worthwhile checking the oil levels in your car on a bi-weekly or monthly basis depending on how often you use it, and you can find out how often the oil needs replaced by consulting your car’s handbook.
The process itself is fairly simple too, and if your car has a high enough ground clearance you can perform it without any equipment. If your car is a bit lower, then you can either drive it up a ramp, park it on a curb or put some jack stands underneath it.
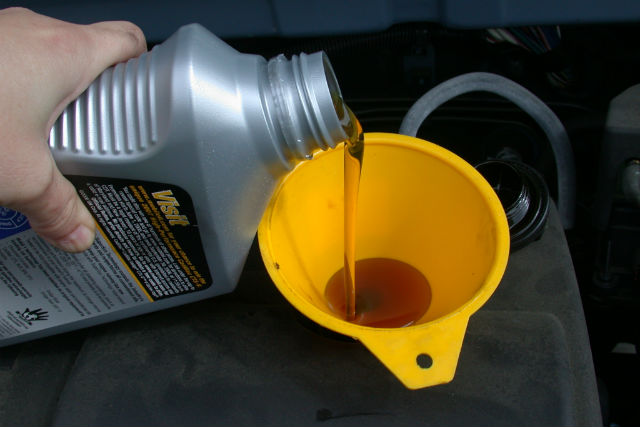
Once you’ve got easy access to the underbody, slide a pan underneath the car’s oil drain bolt, which you can find by consulting the handbook. Pop the bonnet and remove the oil fill cap and then release the oil drain bolt, which will let the oil flow out into the pan.
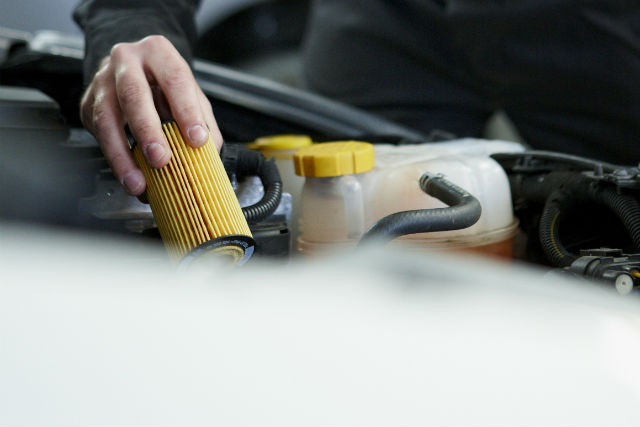
You’ll also be able to locate your oil filter underneath the car, which you can twist off and clean, or just replace it altogether. Tighten the drain bolt underneath and pour the new oil into the filler hole in the engine compartment, and then screw the cap back on.
From there, you should fire your engine up to distribute the new oil throughout its components and check underneath the car for any signs of leakage. Fairly straightforward, very rewarding and cost-effective too, as that would cost you up to £60 at a garage.
Change your air filter
Along with your oil, one of the things that will need changed most frequently on your car will be the air filter, and luckily it’s an easy and cheap thing to swap out.
Most of them won’t require any tools whatsoever to change. Just locate the air box in your engine compartment by checking your manual, flip down the latches and then wiggle the paper air filter off the top of the air induction pipe.
Some modern vehicles will fasten the air box with screws, but that requires a simple screwdriver which you should have lying around the house. Pop the old filter off, the new one on and then tighten up the air box and the job’s done.
Anybody looking for a quick performance boost might want to look into changing their air filter for an aftermarket performance filter. Filters made by brands like K&N are still cheap compared to many other aftermarket parts, and claim to be able to boost your horsepower output by between one and two per cent.
Even if you’re not bothered about increasing your car’s performance, the fact that doing this job by yourself can save you as much as £40 at a garage makes it worth giving it a go.
Remove scratches in the paintwork
Even if you’re ultra-careful, rogue shopping trollies, errant car doors and inattentive passers-by can spell danger for your car’s paintjob.
But instead of opting for a respray, which can cost thousands of pounds depending on the car and paint used, it’s actually very easy to remove a large number of paint scratches and scuffs with nothing more than everyday toothpaste.
Toothpaste works because it’s very lightly abrasive, acting like a much lighter and much softer form of sandpaper. If that sounds a bit too harsh to use on your car’s finish, bear in mind that it’s the exact same stuff you’ve been using on your teeth every morning for the entirety of your life.
It works best on scuffs and scratches that haven’t fully penetrated the paintwork’s clearcoat, so if your finish has a scratch deep enough that you can get your fingernail into it, toothpaste might not work.
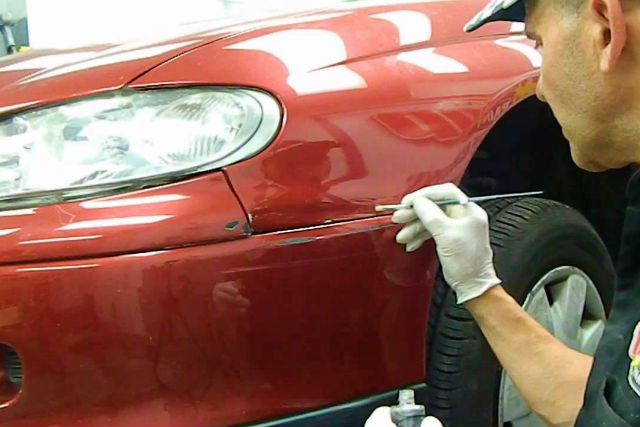
Still, if you have some light scuffing or scratching, all you need to do is take a damp, soft cloth and a smear of toothpaste, and rub it on in small, circular motions. With a bit of elbow grease, the scratch and scuff mark will disappear.
Once the blemish has been reduced, just give the area a thorough wash before polishing or buffing it to work out any swirl marks or imperfections.
Replace a lightbulb
How many service garage mechanics does it take to change a light bulb? Well, none if you do it yourself, and could even save you up to as much as £70 a pop as well.
Be aware, though, that some bulbs can be a pain to change and can require the removal of some of the car’s components, so if this is the case for your vehicle then it is worth it taking it to the experts.
However, in most cases, changing the bulbs is a straightforward and easy job, with usually the only tools you’ll need being a couple of screwdrivers to unscrew access covers to get to the headlight bulbs.
To find out which parts of the headlight housing needs to be accessed to change your bulbs, and where to access them from, you can either consult your car’s manual or read guides on the internet.
Once you’ve accessed the housing, all you have do is screw out the old bulb and replace it with a brand new one, the same as you would with any bulb in your house or in a lamp. No extortionate fees and certainly no jokes necessary.
Replace your brake pads
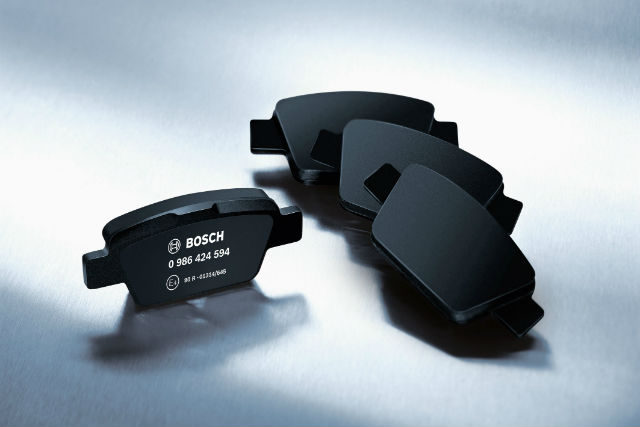
Of all these jobs, replacing your brake pads is probably the most risky, so unless you’re 100 per cent sure, we’d advise getting somebody with a bit of knowledge to supervise you the first time.
Nonetheless, replacing the pads on your brakes, provided they’re disc brakes as the vast majority of modern cars have, is fairly simple. Given that brake pads wear out so frequently, it can also save you quite a bit of money, as much as £120 a pop in some cases.
First of all, jack your car up using a jack stand and remove the wheel as you would with a wheel change. On the brake calliper you’ll find two sliding-pin bolts which you can then unbolt, removing the calliper.
Once the calliper has been removed, you can simply take the old pads off. However, because the replacement pads will be thicker due to the fact that they aren’t as worn, you’ll have to compress the calliper with a C-clamp to make sure that it fits back over the new brake pads.
Once that’s done, you can simply pop the new pads back on before reassembling the calliper over the pads, refastening the sliding-pin bolts and removing the C-clamp.